How To Do Maintenance On Carver Skateboards?
- Categories Blog
- Date February 10, 2024
How to Do Maintenance on Carver Skateboards?
Hello SurfSkater,
Is your SurfSimulator exhibiting any strange behavior?
Do you want to regain that wonderful feeling of speed and fluidity while riding your Carver Skateboards?
If yes, this content was created just for you! We will teach you how to easily perform a complete maintenance on your Carver Skateboards.
There are basically two types of maintenance in surfskate: preventive or corrective. Both involve similar actions, differing mainly in the speed of the process or the need for component replacement.
In general, maintaining your Carver Skateboards will ensure performance and increased durability of your surfsimulator over time.


Topics Of Article
How to store your Carver SurfSkateboard?
When it comes to storing your Carver Skateboards, it’s crucial to consider the three main factors that can damage your equipment: moisture, heat, and sea breeze.

Therefore, it’s advisable to store your surfsimulator in a cool, dry place, preferably indoors. Pay extra attention if you live near the ocean, as the combination of moisture and salt in the air can lead to premature wear of the bearings and drying out of the wheel’s core.
Main factors that damage Carver Skateboards
It is crucial to know that the bearings are the main components susceptible to damage when the surfsimulator comes into direct contact with water, leading to rust on the balls and creating friction that hinders smooth rolling.
Additionally, be aware that there are bearings not only in the wheels but also 2 other axial bearings (pressure) of different diameters in the front truck.


The wheels naturally tend to decrease in size as you use your Carver SurfSkateboards. In some cases, cracks may appear on the edges of the wheels, or even the core supporting the bearings might break. Pay attention to this!

Bearing Maintenance
To properly clean the bearings of your surfsimulator, use isopropyl alcohol (at least 90%) or a specialized bearing cleaner. Avoid using water, as it can cause rust!
Use a sharp object (small pin) to carefully remove the bearing shields, making sure not to damage the fitting, and clean the surfaces with a damp cloth!
Submerge the bearings in a disposable container with ethanol solution, shake well until some impurities come off.

Repeat the process until the ethanol in the container is no longer discolored and can be considered clean. To intensify the process, you can soak the bearings for an average of 4 hours.
Dry the bearings by exposing them to the sun for some time or placing them on a paper towel for 2 hours. Once done, you can now lubricate your bearings sparingly.
You can also use compressed air (optional) to blow out any remaining debris and help dry the bearings.
Bearing Lubrification
The best lubricant for surfskate bearings is typically a fine oil specifically designed for skateboard bearings, such as speed cream or a silicone-based lubricant.
These specialized lubricants are formulated to handle the high speeds and pressures experienced in surfskating, providing optimal protection and performance.
Some people use sewing machine oil or white mineral oil as a makeshift solution, but these are generally less effective in high-speed and high-pressure applications, like surfskating.
Although this type of makeshift oil may temporarily reduce friction, it does not offer the same level of long-term protection against wear and environmental factors, such as moisture, ball corrosion, and dirt accumulation in the casing, compared to the results provided by specialized lubricants for surfskate bearings.
That said, after properly lubricating the bearings in your surfskate wheels, reinsert the bearings back into the wheels to proceed to the next maintenance step.
Maintenance on C7 Carver Skateboards truck
The main feature of a surfsimulator is the use of a flexible front truck with a spring mechanism to provide the athlete with elastic potential in speed projection and responsive turns.
Make sure to check both trucks (front and back), pay special attention to the front truck to ensure durability to the most crucial part of the equipment, your safety as an athlete, and better performance.

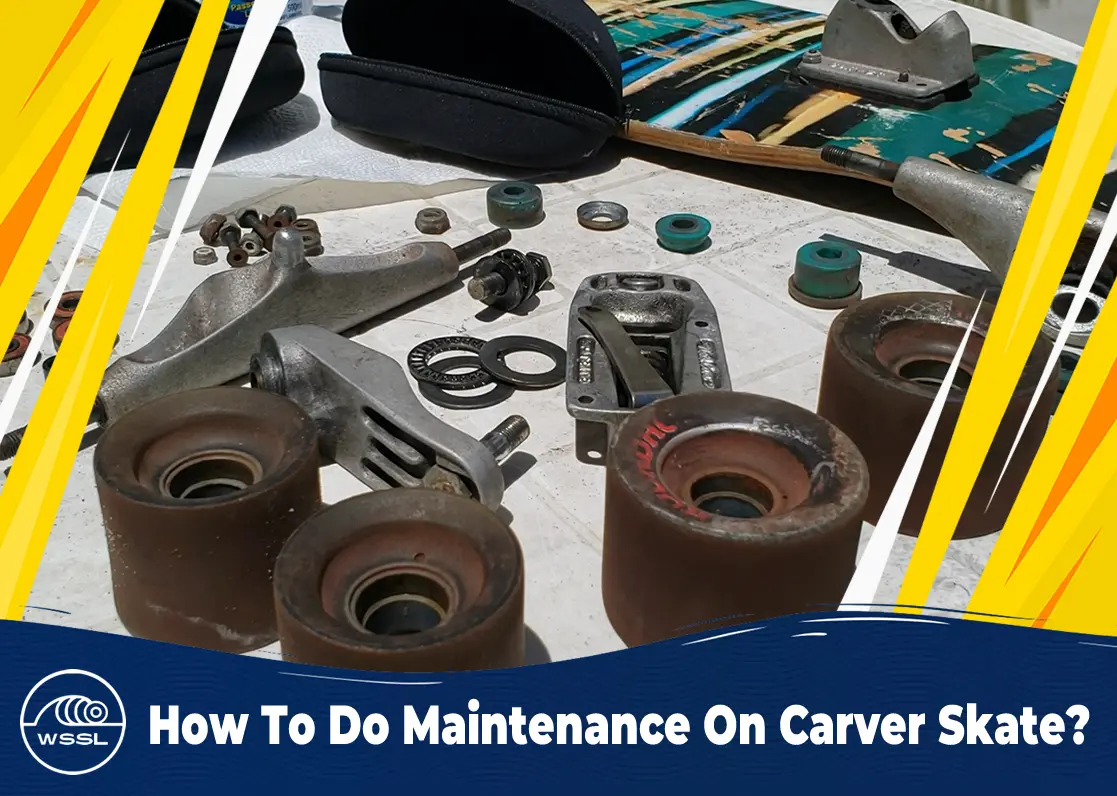
In this case, for example, we will remove the C7 truck from the Carver Skateboards deck, you will find an internal spring and pin mechanism that allows adjusting the truck’s flexion through tightening/loosening of the screw.
I suggest changing the grease every 6 months, depending on usage frequency.
Completing the full maintenance of your surfskate also includes cleaning and lubricating the bearing rings, always checking for signs of wear.
To detach the parts ( base / arm ) and access the axial bearings, you will need to remove the semi-washer present on the adjustment screw and completely loosen it until the screw comes out completely.
The next step is to fully loosen the vertical screw; now you have access to both axial bearings of different diameters.


Clean them similarly to the wheel bearings process and apply lubricant.
In this case, as the procedure is more labor-intensive and you won’t do it as frequently, I suggest applying a bit of grease to keep the bearing hydrated for a longer time.
There is still a key component in the surfskate system that, if neglected, can lead to the total failure of the Carver Skateboards truck. I’m talking about the C7 Pivot Cup Set!

Naturally, this rubber will wear out over time, and if not replaced in a timely manner, it can lead to excessive wear on the aluminum parts.
Griptape Maintenance for Carver Skateboards
Even though Carver Skateboards original griptape is of excellent quality, it can still wear out over time, lose grip, or simply get dirty.
Imagine a surfer without wax… so, having a grippy surfsimulator is essential in the same way because you need to feel your feet secure on the board to position yourself more safely and gain control during maneuvers.
If the griptape is still functional, you can simply rub a specific product that removes dirt and stains.
If you feel that your surfsimulator has lost its grip, it’s indeed better to replace it with a new griptape! But if you’re not replacing it with an original Carver Skateboards griptape, assess rigorously whether it’s really worth changing, as some other griptapes found in the market are of questionable quality.
1. To begin the griptape replacement, use a hairdryer to soften the old adhesive tape.
2. Remove the protective paper and place the adhesive side of the griptape on the top edge of the deck. Press it down, and if there are air bubbles, poke them with a knife and massage them out.
3. Run a screwdriver along the edges of the board until you see a white outline of the deck.
4. Underneath the surfskateboard, run the Stanley knife along the edges of the board following the outline made by the screwdriver.
5. Use some leftover adhesive tape to sand the edges of the deck until they are smooth and pressed down.
Hardware Maintenance
Pay attention if your hardware is starting to rust; replace it before it becomes challenging to remove!
If you already have rusted hardware that you want to remove, try applying WD-40 for several hours before attempting to unscrew it.
It’s important that when removing the hardware, you use a well-fitted Allen wrench or a Phillips screwdriver to reduce the risk of screws getting stuck.
Rafael Azevêdo pioneered SurfSkate and developed this new authentic modality in 2014 through hosting championships and social events in Brazil.
He built the legend StreetStyle SurfSkate Park and established the key criteria through WSSL to globally regulate the new surfskate modality.
Full-stack professional in Marketing and Technology, SurfSkate Coach, Content Producer, and CEO of the World SurfSkate League.
You may also like

Cruiser vs SurfSkate


